Its egg season for sure! As they days get longer and longer egg production goes up and up. Here is my egg production for the last several months
- February=47 eggs, from about 15 laying hens
- March=160 eggs
- April=236 from about 11 hens. 2 hens were killed by the hawks and one hen has gone broody. Broody means she wants to be a mama, so she is sitting on a clutch of 11 eggs. She does not lay new eggs while sitting on a clutch and that is ok. Because she is dong a good job of trying to increase the flock size. Sunday evening May 19 is the first chance for the eggs to hatch.
- May=130 eggs by may 18
I’m getting more eggs than I need right now. But I remember how I ran out of eggs in December and January and February. So I’m ‘putting up’ eggs for the lean times. by following these instructions from “The New Buckeye Cook Book” published in 1904
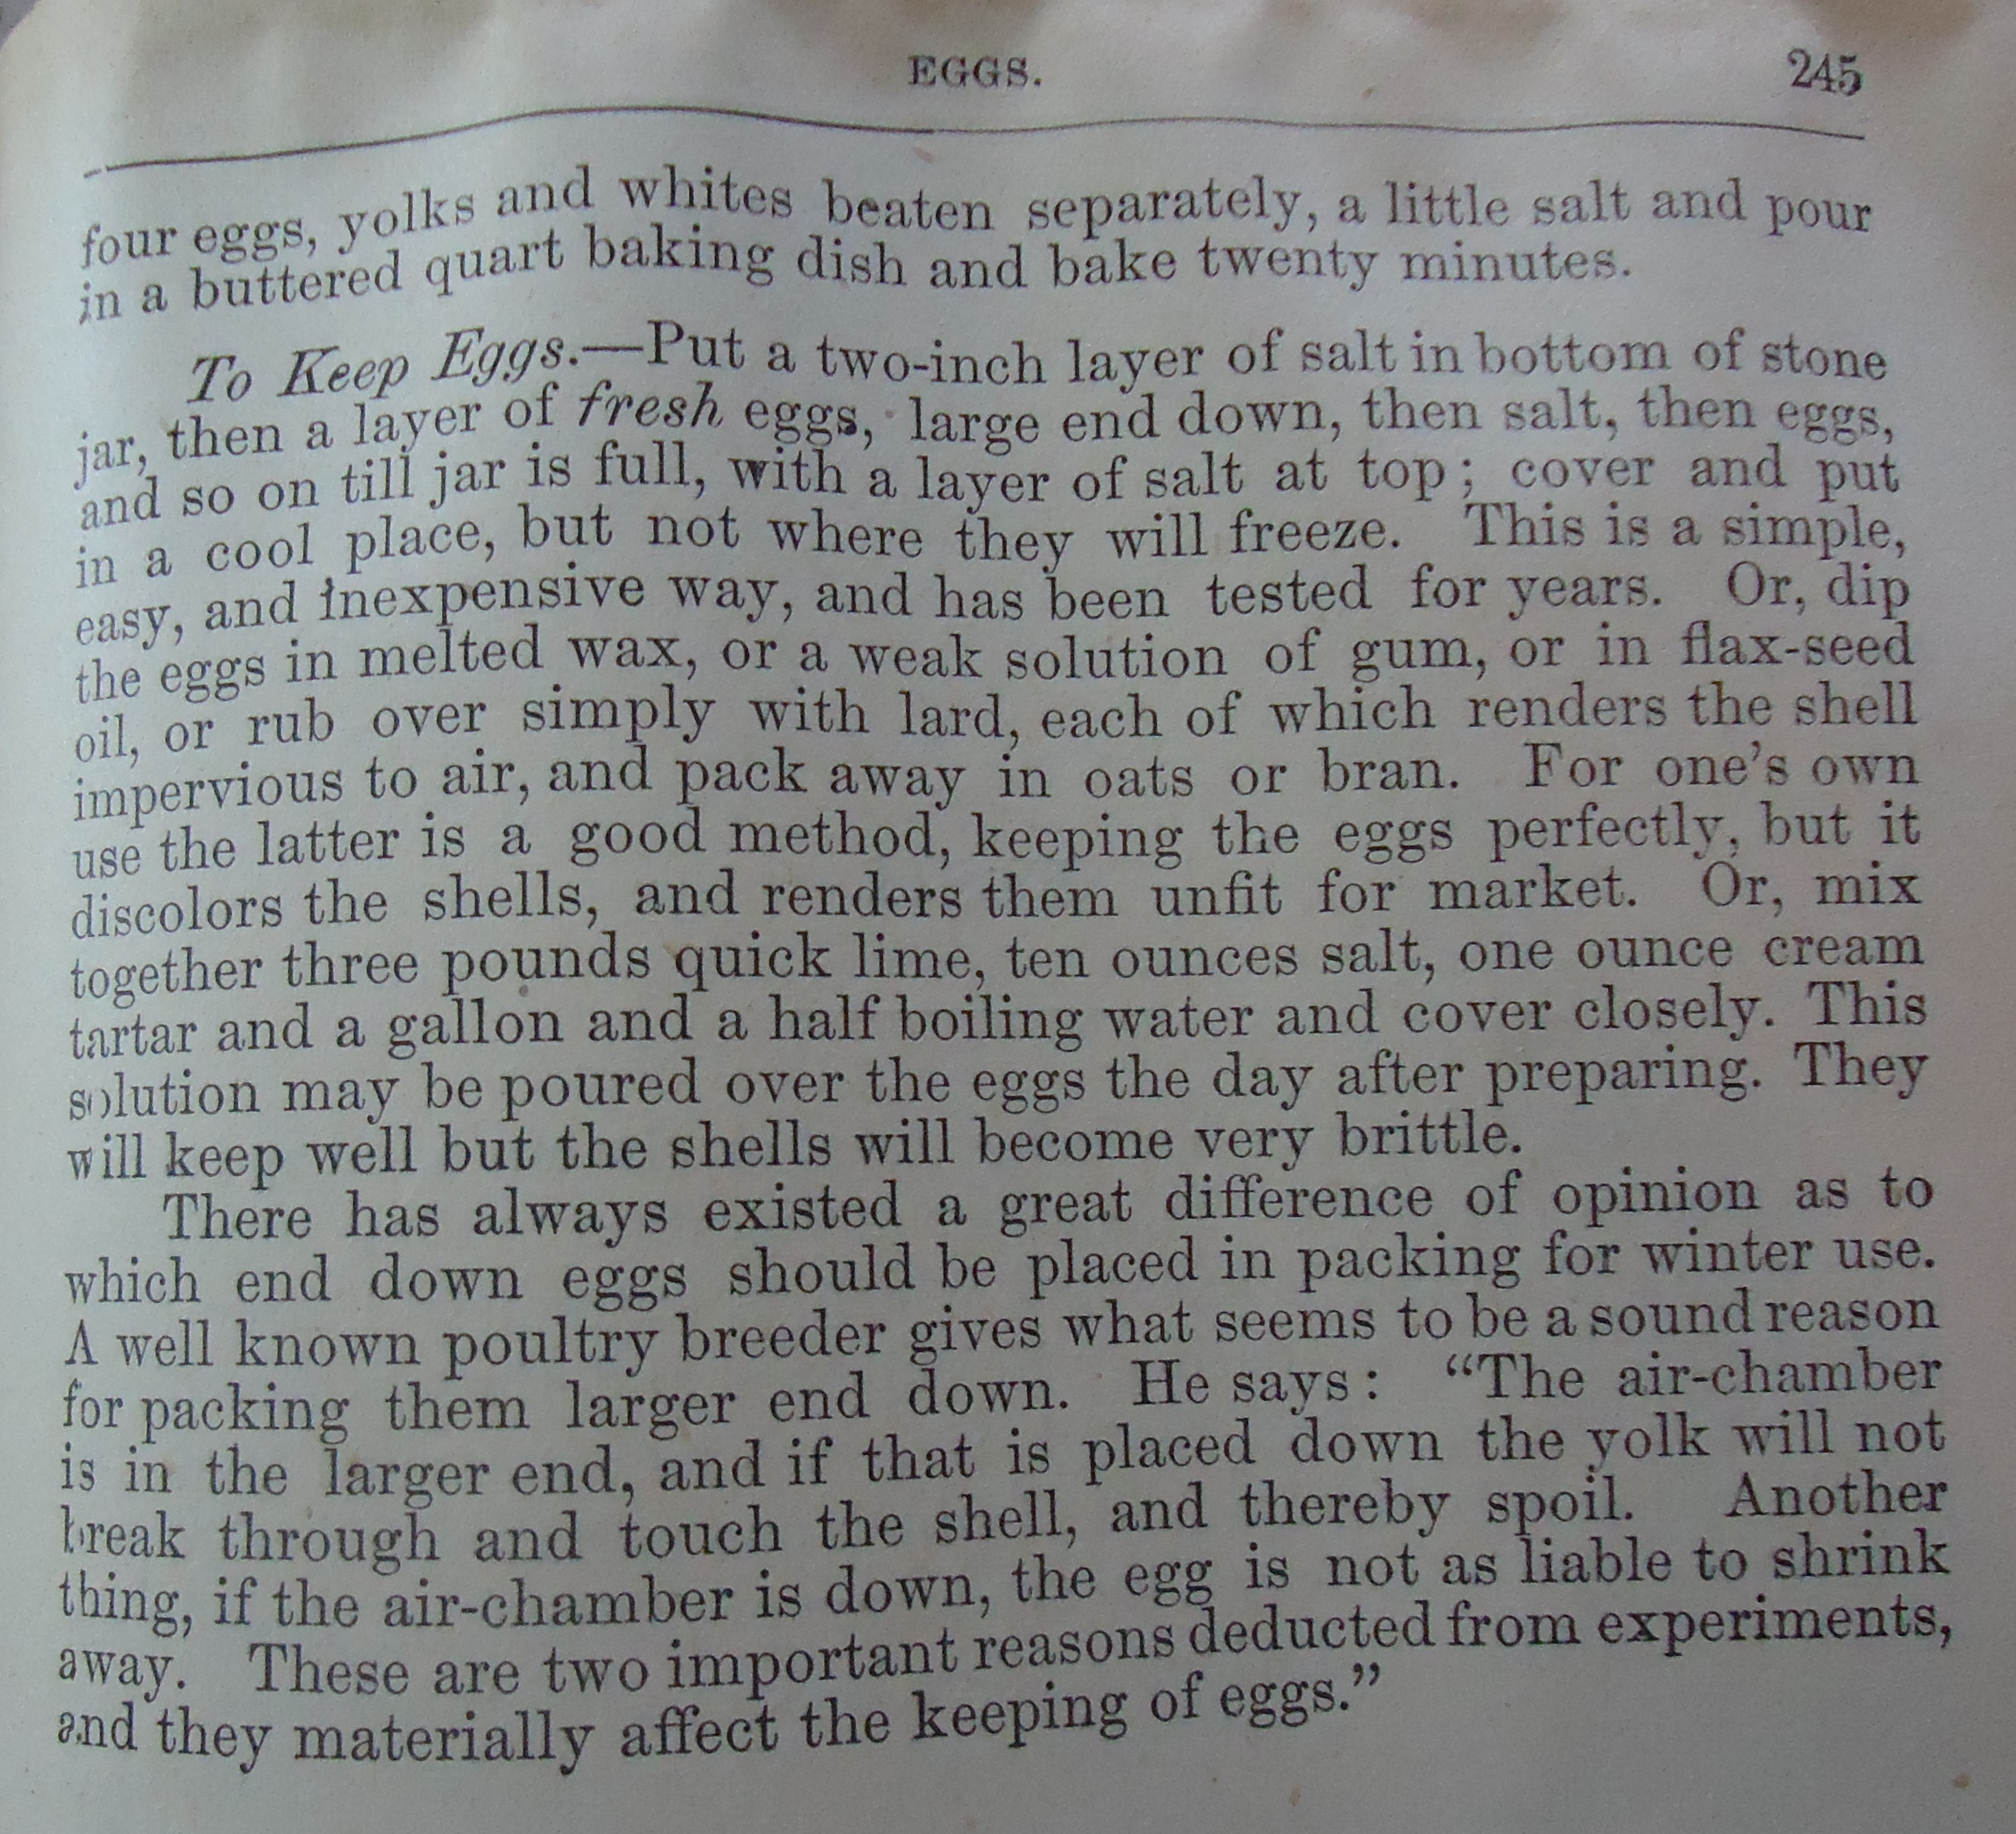
Instructions on how to keep/preserve eggs to winter time. From “The New Buckeye Cook Book” published in 1904
To do this I dip the eggs in bees wax and then store them in layers of oats. The oats act as a medium for storage. They keep the eggs safe from breaking and bumping into each other. I put up 28 eggs this way so far. And about a month ago I put about 4 dozen eggs using lard instead of beeswax. I do prefer the beeswax method. I plan to do more waxed eggs for the next 4-6 weeks.
Take a peek at the waxed eggs below. The wax closes up the pores on the shell and helps them last longer.
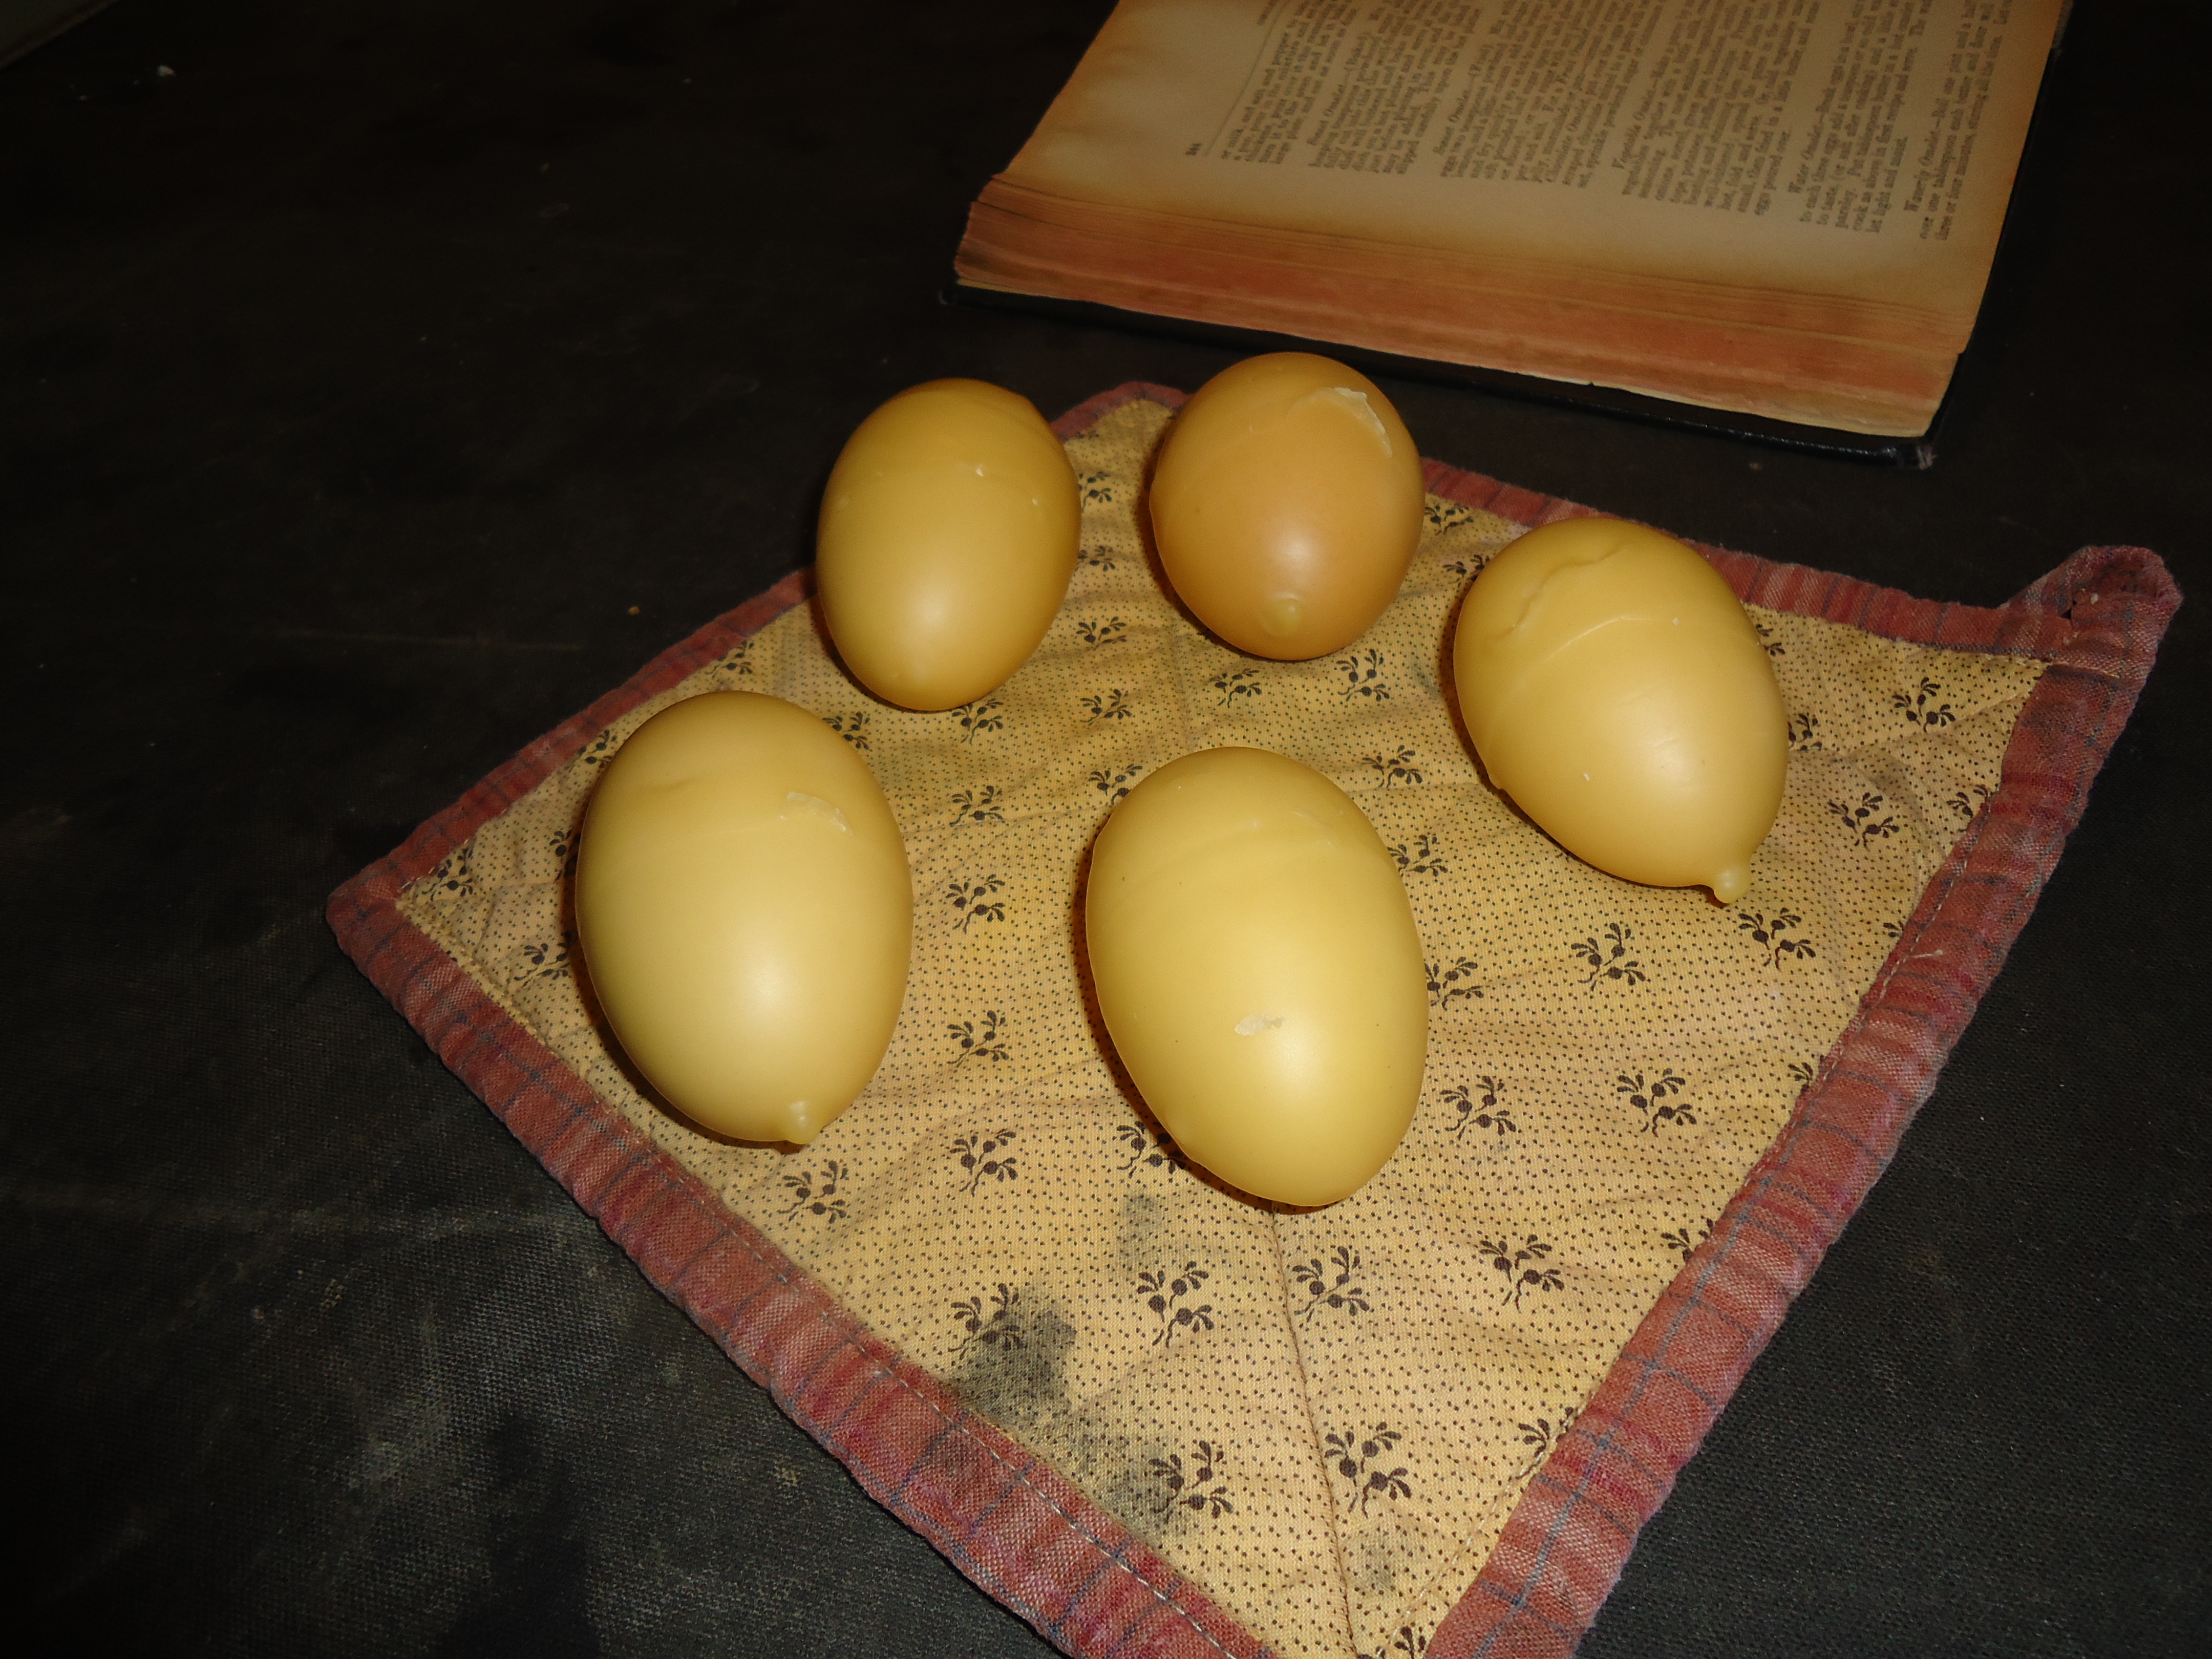
These eggs have been dipped in beeswax to help preserve them to leaner times of winter
After the eggs have completely cooled and hardened they are packed into crocks of oats Put a layer of oats on the bottom then add the eggs. The eggs should go in big end down. Repeat till the crock is full and then cover with a heavy cloth and string. Keep the crock down in the cellar.
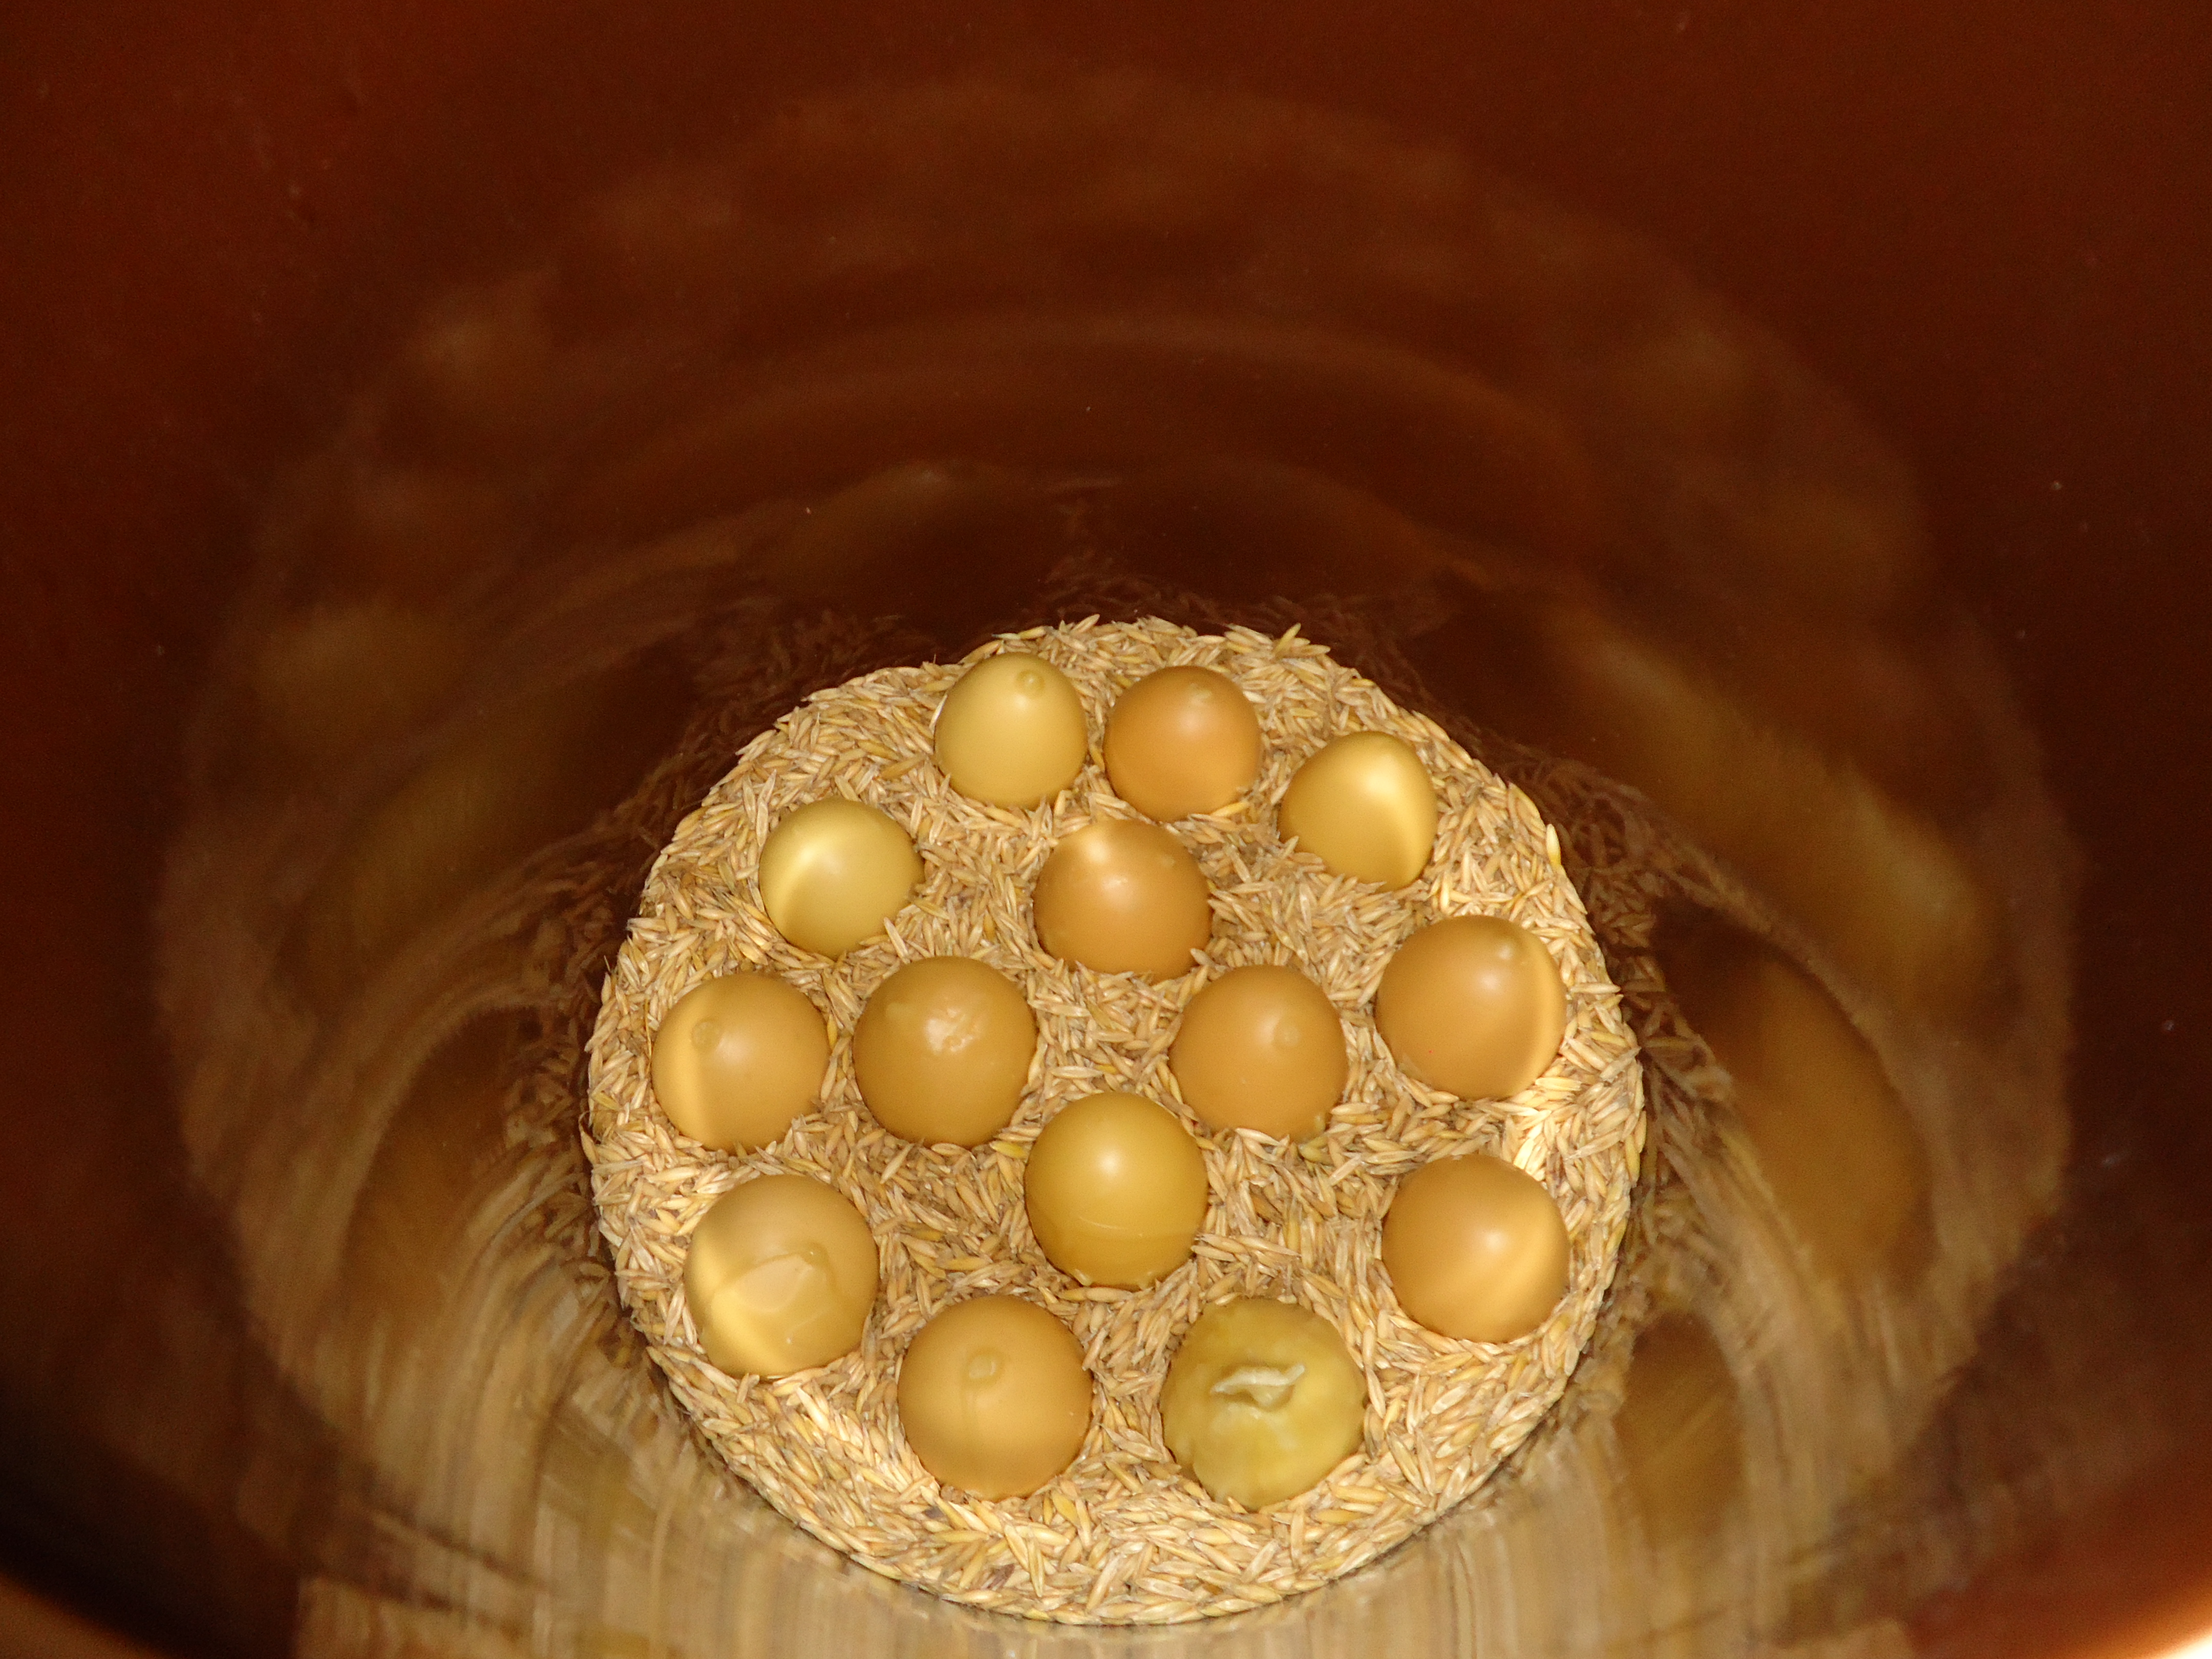
Eggs coated in bees wax stored big end down in a crock filled with oats. A common way to preserve eggs
These eggs will be great for cakes and cookies and the such. They don’t suit too well for scrambled for fried. I first learned this method when I worked at Firestone Farm at Greenfield Village, which is part of The Henry Ford. And it works!
Maybe this winter we will have enough eggs to eat pound cake all winter!
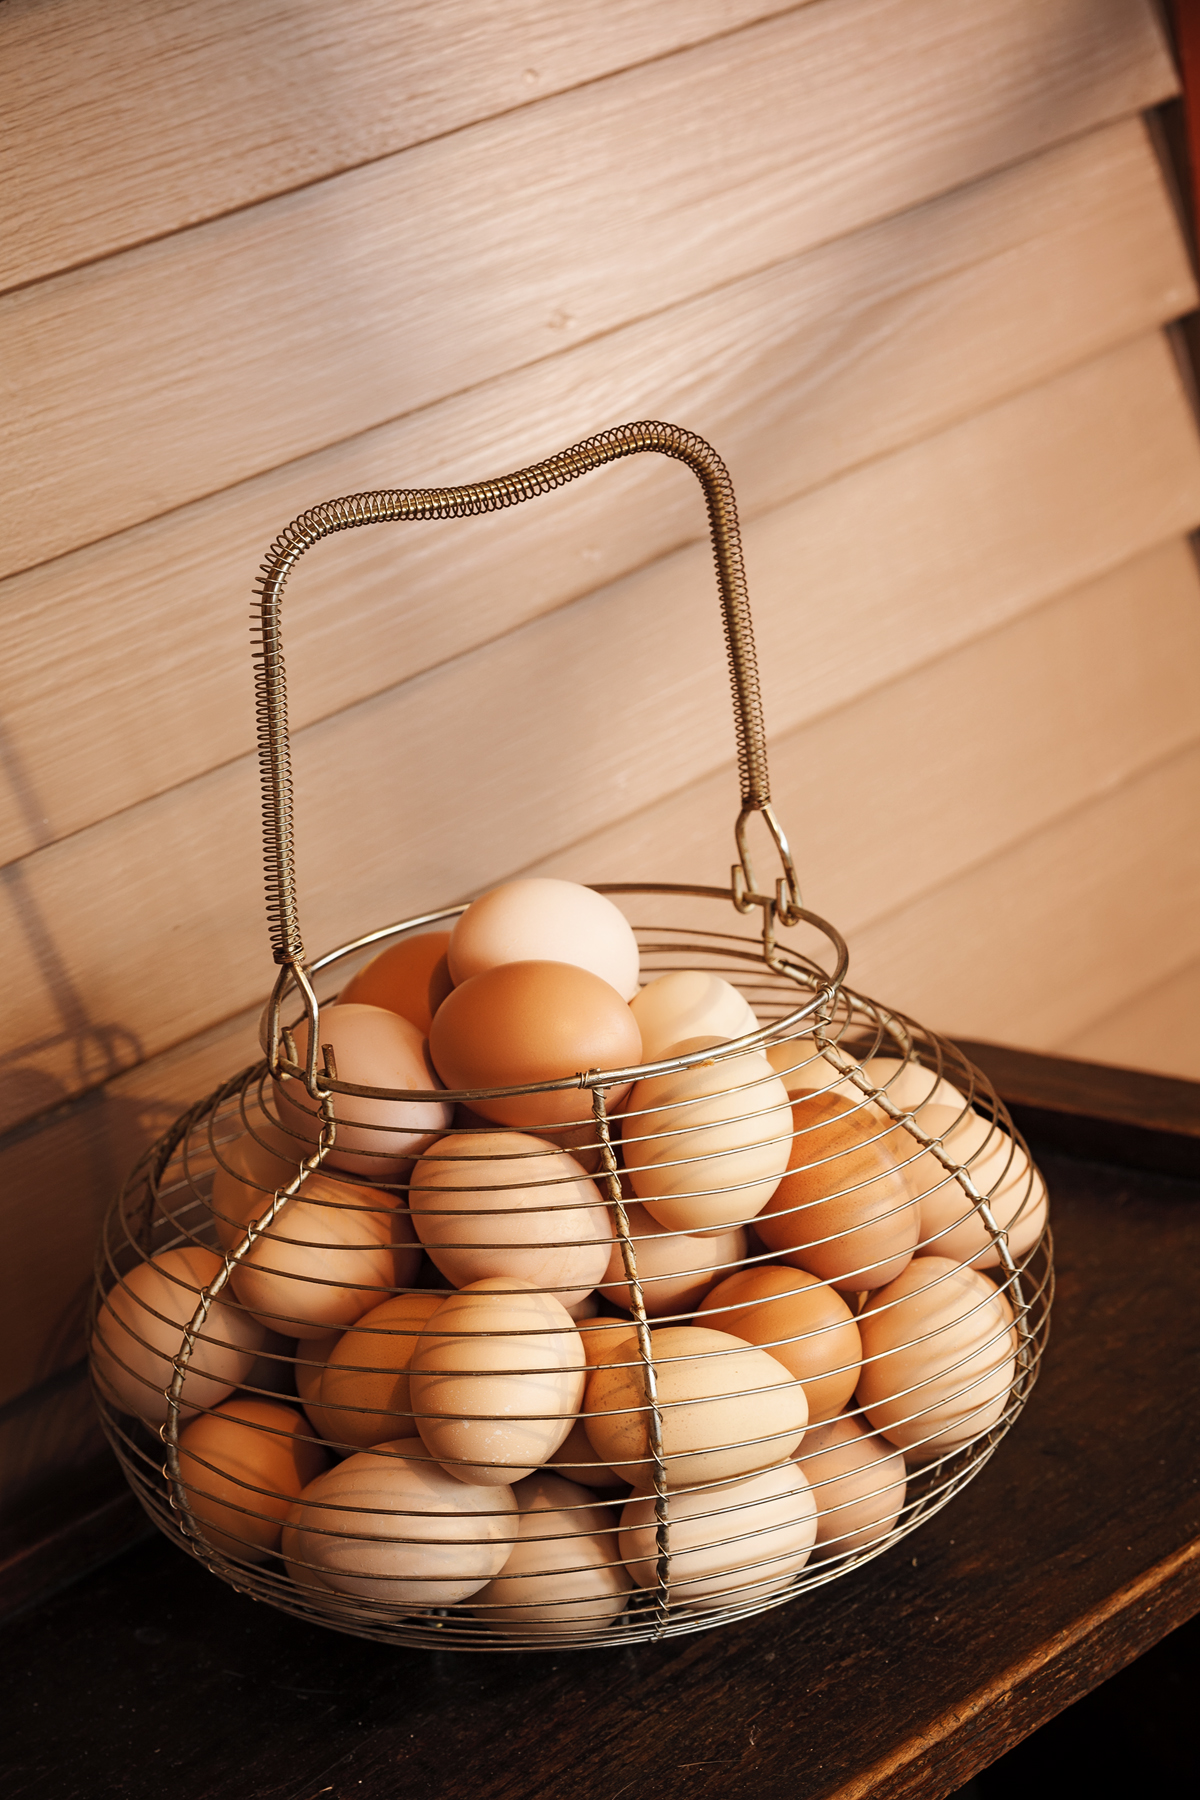
The fruits of their labor, eggs for eating and baking!